WPCodeBox UI
Main interface
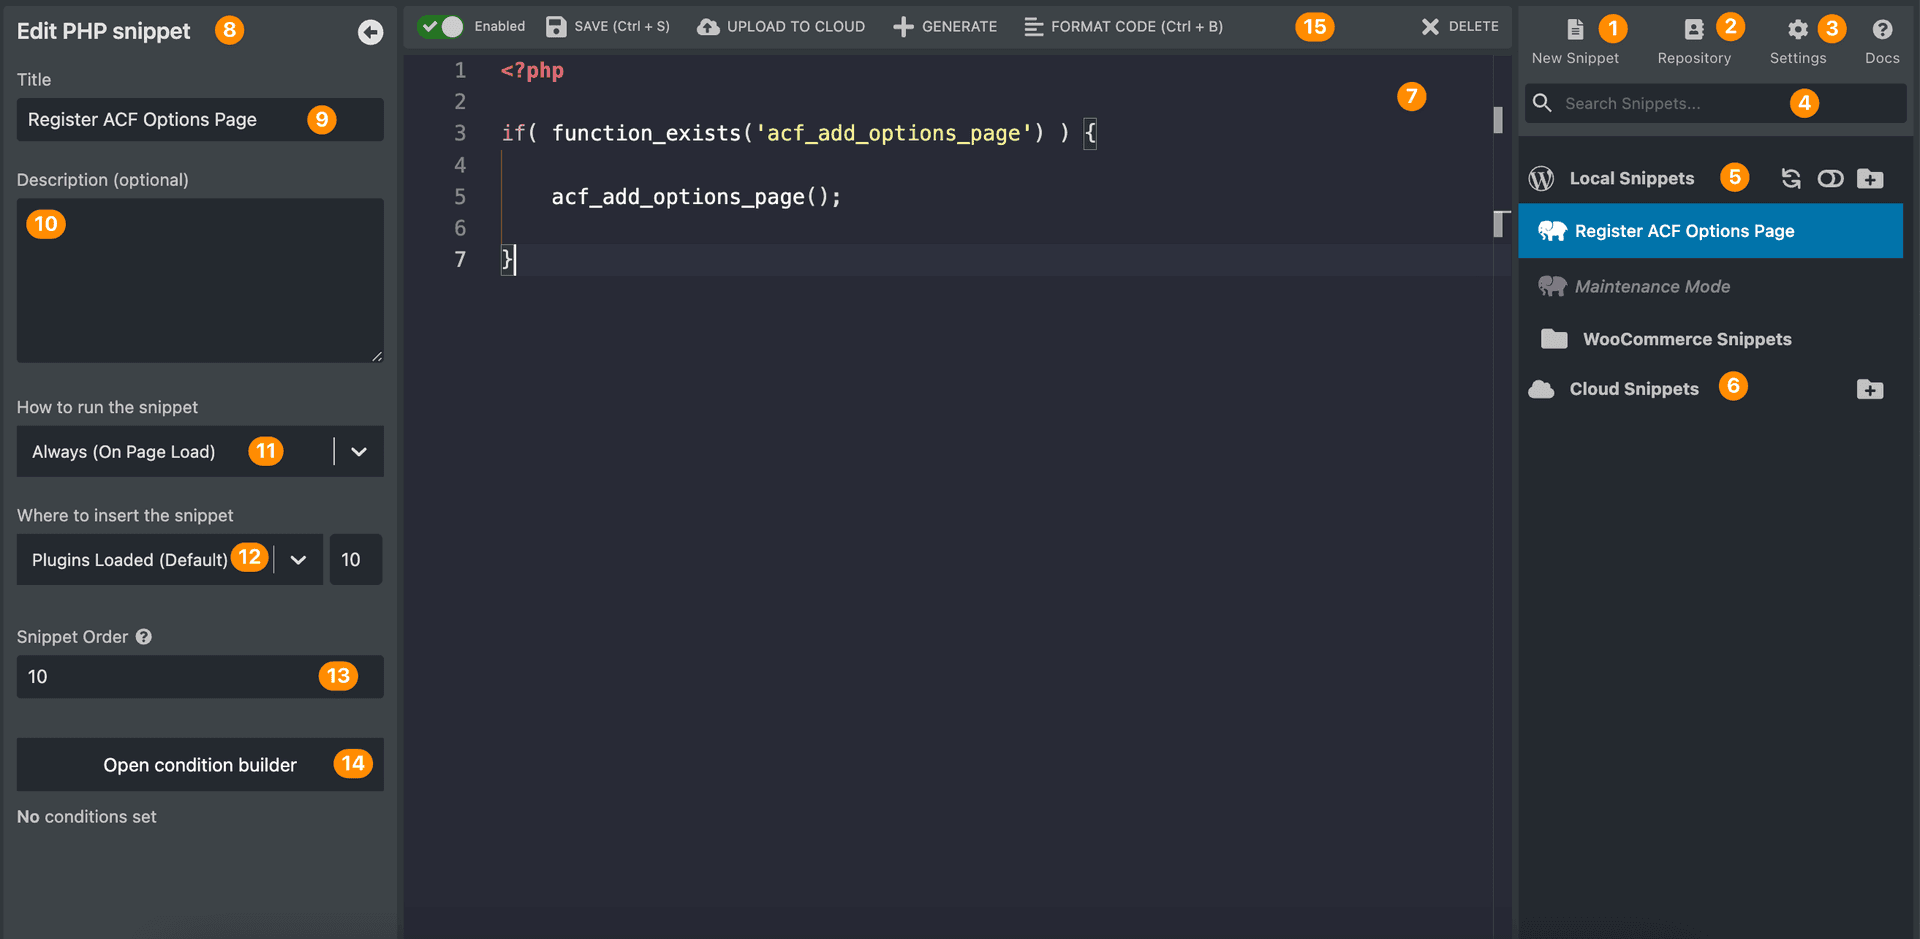
1. Create new Snippet Button
Using this button you create a new Snippet. Before you save the snippet make sure to select the snippet type. Once the snippet is saved, its type cannot be changed.
2. WordPress Snippet Repository
This is the place where you can find all the snippets that are available in the WordPress Snippet Repository. You can search for snippets using the search box. You can also filter the snippets by category.
3. Plugin Settings
Here you can set your WPCodeBox Cloud API Key. Also, you can edit the editor settings, like layouts, font sizes or line wraps.
4. Snippet Search
Using the search textfield, you can search the local snippets by name, description or code. For example, if you want to find all snippets that access an ACF field, you could search for get_field or get_field_object.
5. Local Snippets List
This is the list of all the snippets that you have created locally. You can search for snippets using the search box. If a snippet is disabled, its name will be in italics. Only enabled snippets run. You can create folders to organize the snippet list, and you can push/pull local snippets to and from the cloud.
6. Cloud Snippets List
These are the cloud snippets you have available. You can download and enable them locally. When a cloud snippet is downloaded, it will be disabled by default.
7. Code Editor
The main code editor allows you to edit your Code Snippets. The Editor will automaticallt detect what code snippet you are editing, and will provide completions and suggestions accordingly.
8. Snippet Settings
In this section, you have all the snippet details. You can edit the snippet name, description, and other settings.
9. Snippet Title
The snippet title is the name of the snippet. It is used to identify the snippet in the snippet list.
10. Snippet Description
The optional description allows you to describe in more detail what the snippet does.
11. How to run the snippet
You have 3 options here.
- Always - this will run the snippet automatically (best for snippets that need to run on every page load).
- Manually - this will add a button to the top bar above the editor that allows you to run the snippet manually.
- Using External Secure URL - This will generate an URL that you can call to run the snippet. Useful for running snippets from external services.
12. Where to insert the snippet
This allows you to customize where the snippet will run. The default option is plugins_loaded, and it should be the best for most cases.
You can also select to run the snippet in a custom action or a custom shortcode.
By changing the priority, you set the priority for that respective action. The priority is the argument sent to the add_action function (opens in a new tab).
13. Snippet Order
The snippet order determines the order in which the snippets are run. The lower the number, the earlier the snippet will run. The default order is 10. This doesn't affect where the code runs, but only how snippets are rendered in relation to eachother.
14. Condition builder
This will open the condition builder, where you can conditionally run the snippet. You can add multiple conditions, and you can also nest conditions. Read more about the condition builder here.
15. Current Snippet Actions
From this area you can enable/disable the snippet, save it and upload or download the current snippet from the cloud.